
ZYLtech's Digital Photogrammetry Guide to Excellent Scans Without a 3D Scanner
Posted by Chris Hajdik on Mar 7th 2019
“ZYLtech’s Digital Photogrammetry Guide to Excellent Scans without a 3D Scanner”
Do you ever get tired of printing items from Thingiverse? 3D modeling a bit too time-consuming? What if you were able to take any object you have around the house, office or anywhere really, and get it into your favorite modeling software within just a short amount of time. Sound too good to be true? Well, it is too good but definitely TRUE! Here are my steps and experiences with the technology of Digital Photogrammetry. With this technique, we can create 3D models from objects BIG or small.
What is Photogrammetry? Photogrammetry is the science of making measurements from photographs. You are able to take dozens if not hundreds of digital photos and with the magic of Photogrammetry software, you can recreate an object into an editable, 3D printable model.
Entry level scanners offer mixed results with the environment needing to be perfect. If the environment is not ideal you can have a hard time even getting mediocre scans. In my experience I have used both handheld and tabletop scanners. Both of which can work only if the geometry is very simple along with perfect lighting which can be a hard thing to accomplish.
What you will need:
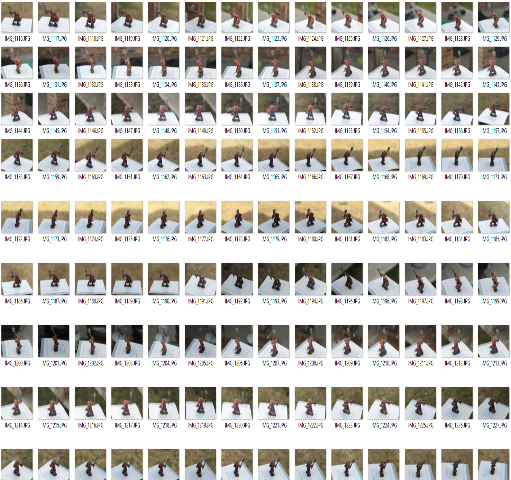
- Photogrammetry software on a speedy computer is preferable. Intel i7 is what I am using with 24GB of RAM. A few links to photogrammetry software are here: 3DF Zephyr, Meshroom, Agisoft Metashape. There are more than this of course. In this guide I use 3DF Zephyr Lite. It is licensed at $150 but it allows you to use up to 500 pictures and I was able to get great results far exceeding any of my scanners. Meshroom is free and open source. It performed well but I noticed some over-lapping of the images incorrectly. It may work for you so give it a shot if you want to do some experimentation.
- A camera. Either a Digital SLR, or a cell phone camera. In this guide I used a Canon 7D Digital SLR. It was easiest for me to transfer photos off of the CF card instead of transferring the photos off of my phone. Be sure to set your F stop to 6.3 to 10. This will make the background blurry while keeping your subject in focus.
- A Platform or Tripod that has 360° access all the way around with about a 5 to 10-foot radius. I was able to get my photos using a tripod and balanced a piece of wood on top of it. Not entirely stable but it definitely worked in a pinch.
- IF you plan on photographing indoors, it is important that you have evenly diffuse lighting. NO SHADOWS for best results!
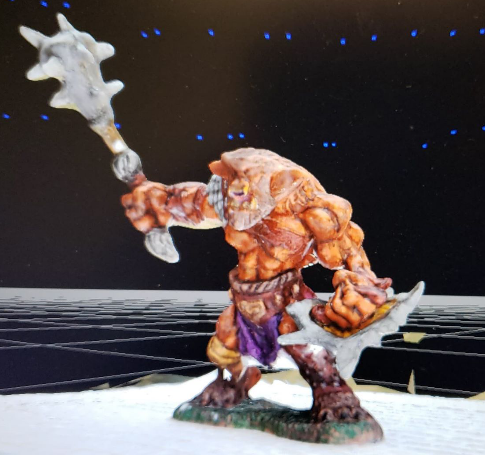
- Something that you would love to “scan”!