
Winter Deer 3d Print and Build
Posted by Chris Hajdik on Jan 11th 2019
Here are the steps we followed to create this massive deer 3D print:
Step 1: We found a file to fit the season and we wanted to increase the size on. In this case, it was Holiday Christmas Deer by Yeg3d on Thingiverse. https://www.thingiverse.com/thing:571949.
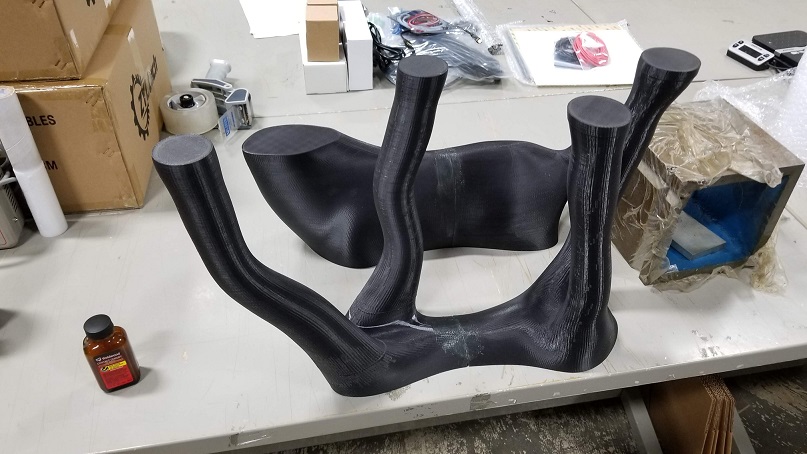
Step 2: Once we adjusted the model to size using Meshmixer (www.meshmixer.com), we used a copy of NetFabb Private (now owned by Autodesk) to cut it into 8 pieces maximizing our print space. This printer is roughly 290x600x500. The model itself came out to be around 43” ( a little over 3.5 ft tall!) We tried using LuBan, but are not too familiar with it. Also, it defaulted to 23 pieces. WAY TOO MANY!
Step 3: 192 hours later, we had all of the pieces ready for assembly.
Step 4: Using contact cement (any brand will do and can be found at most hardware stores) we applied a generous amount to bond each piece. It took about 3 hours to set enough to be moved around.
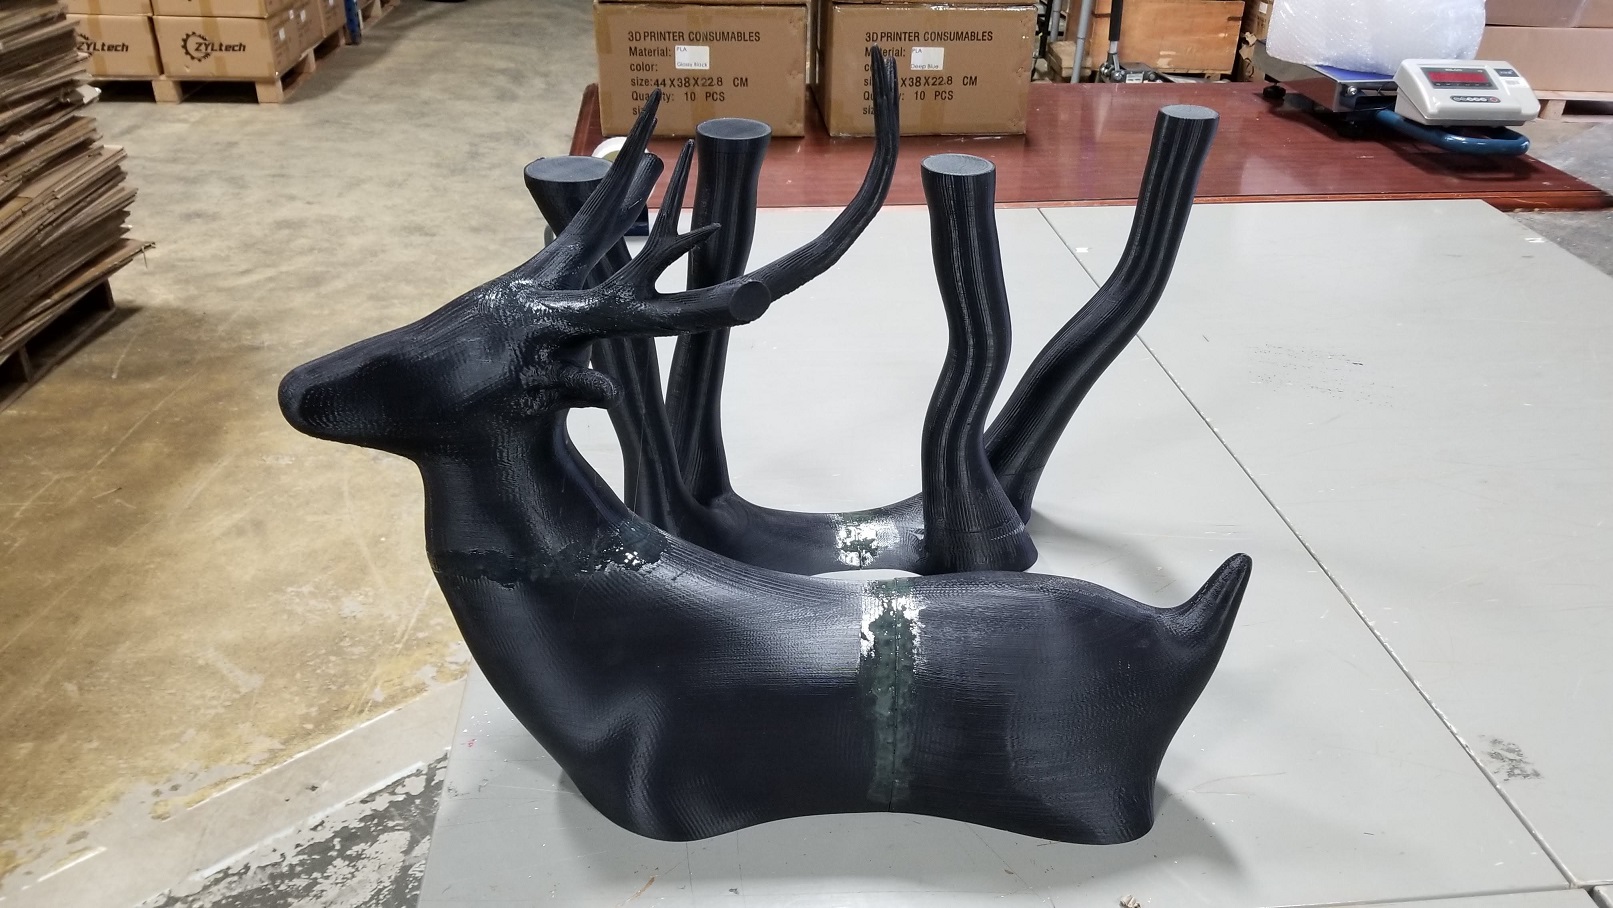
Step 5: After assembly and time to set, we applied more contact cement to fill in any gaps.
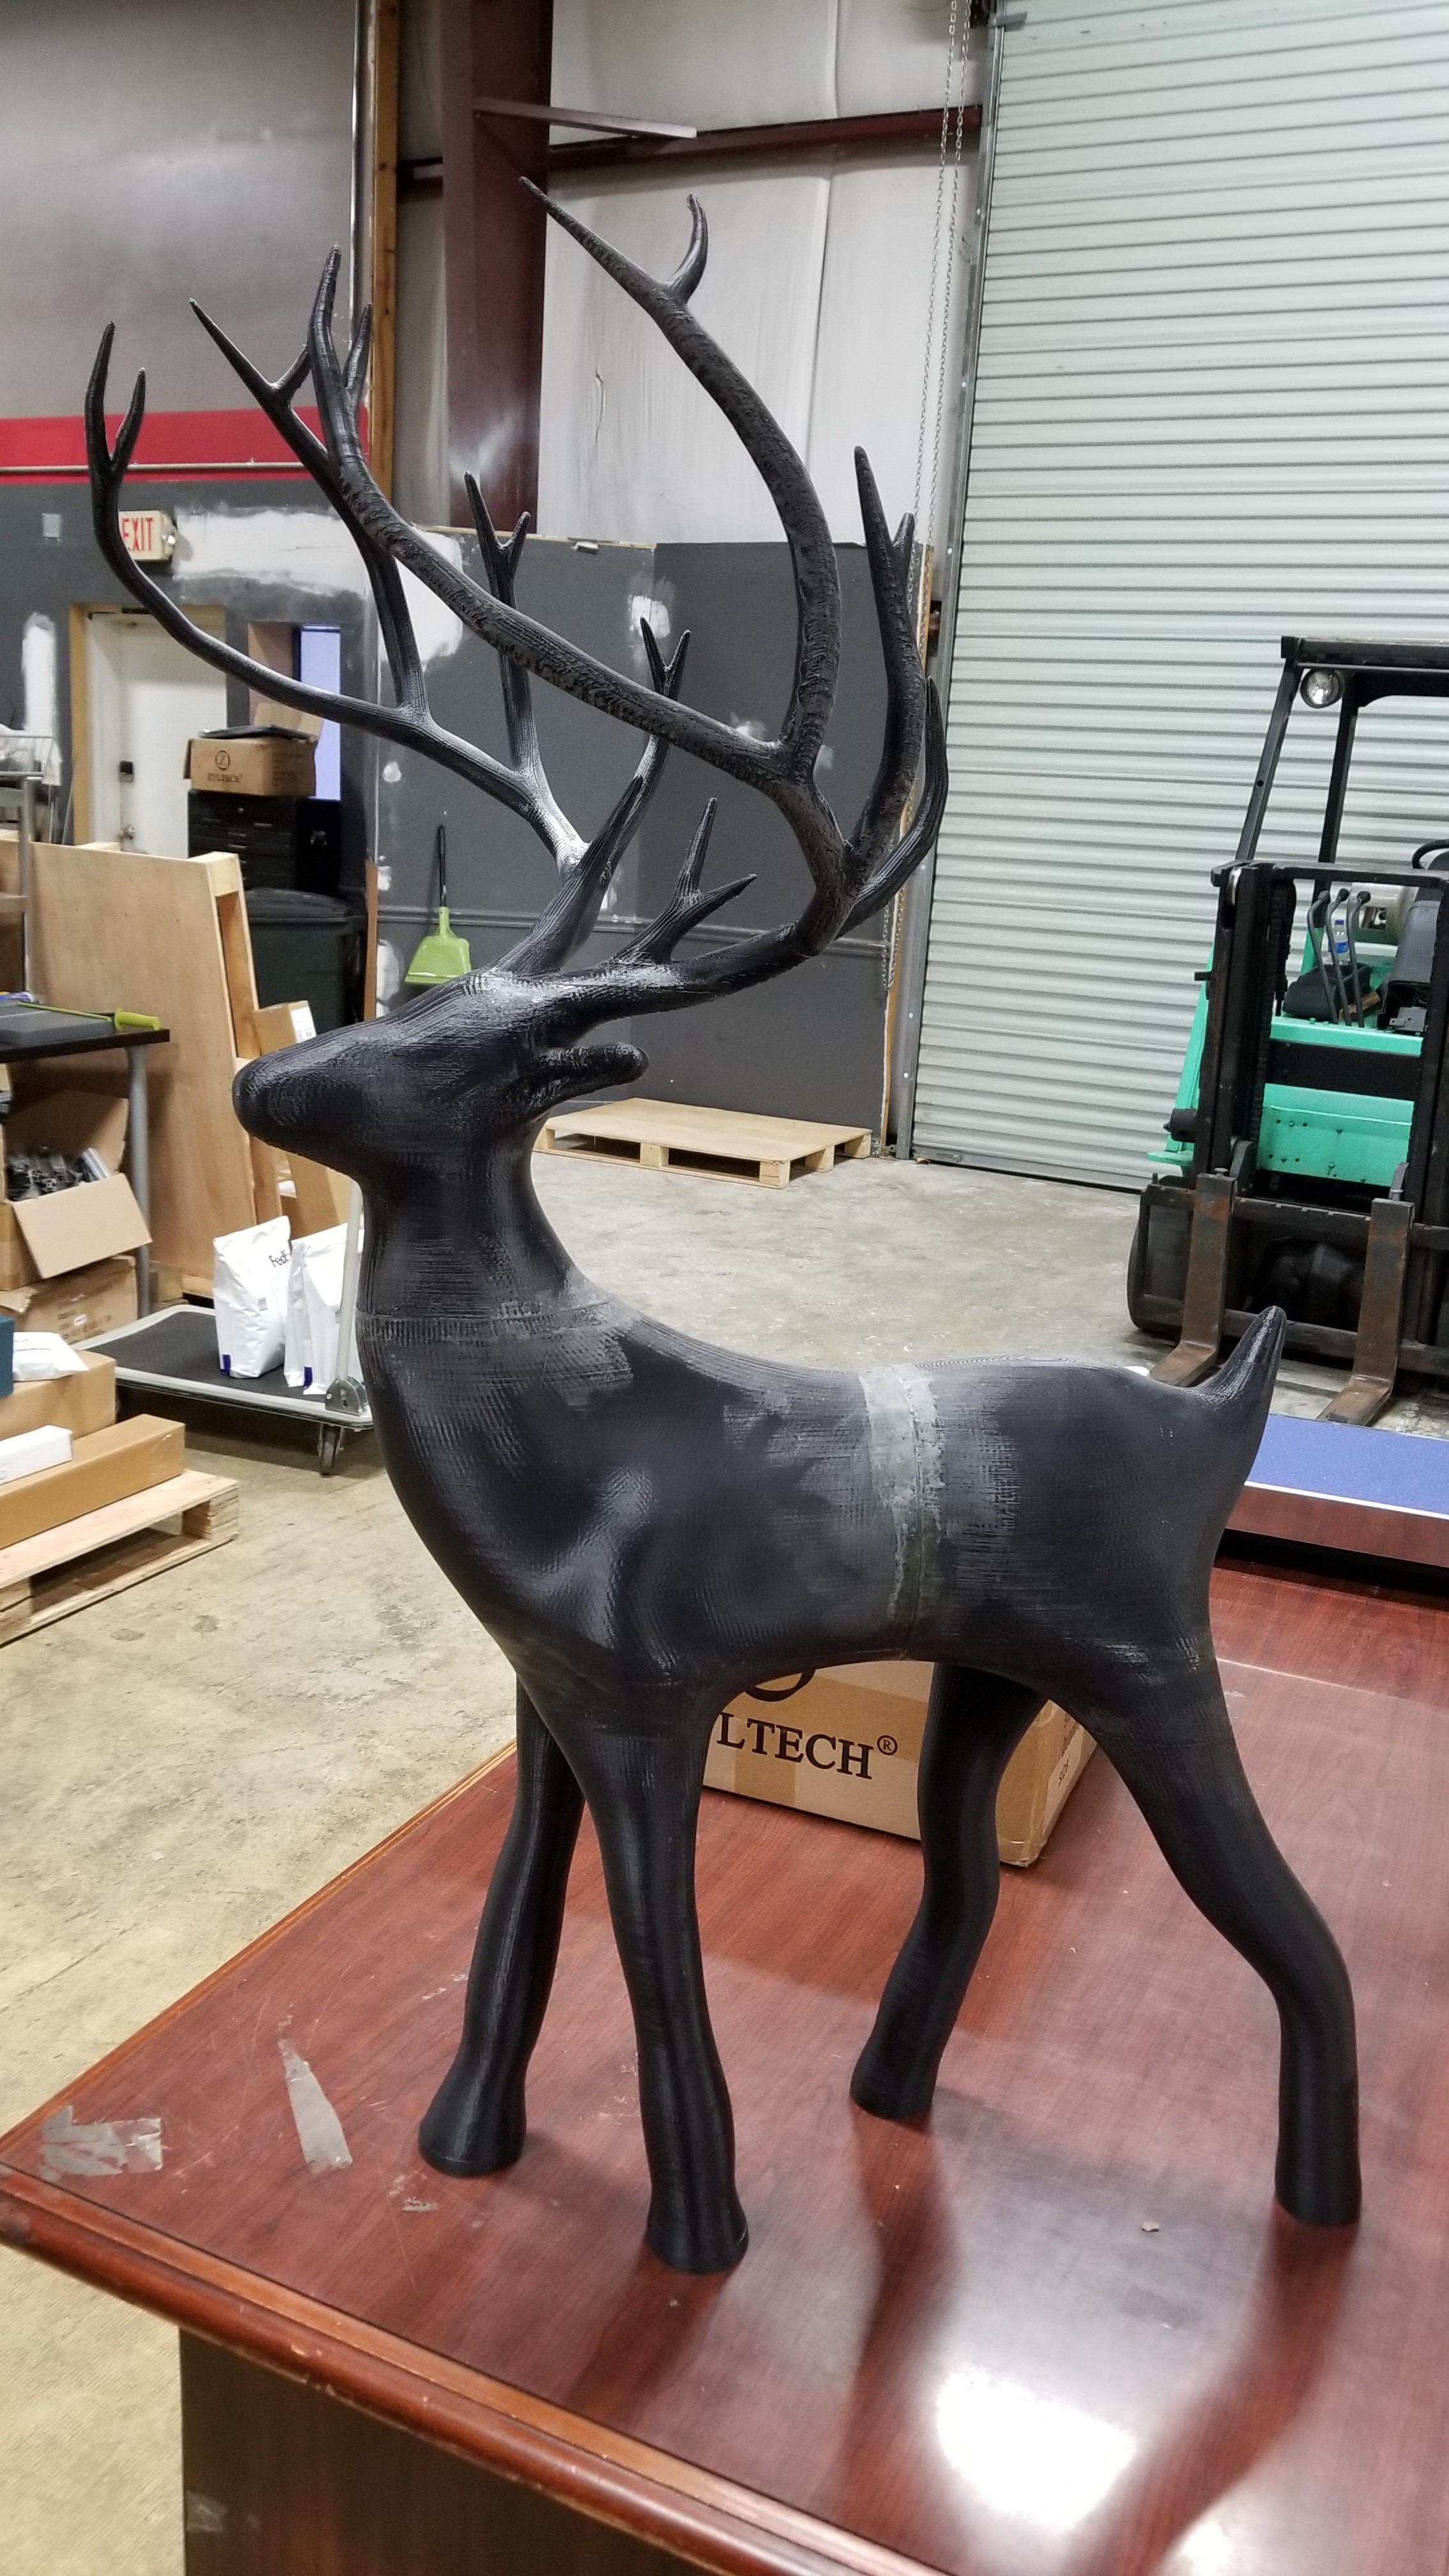
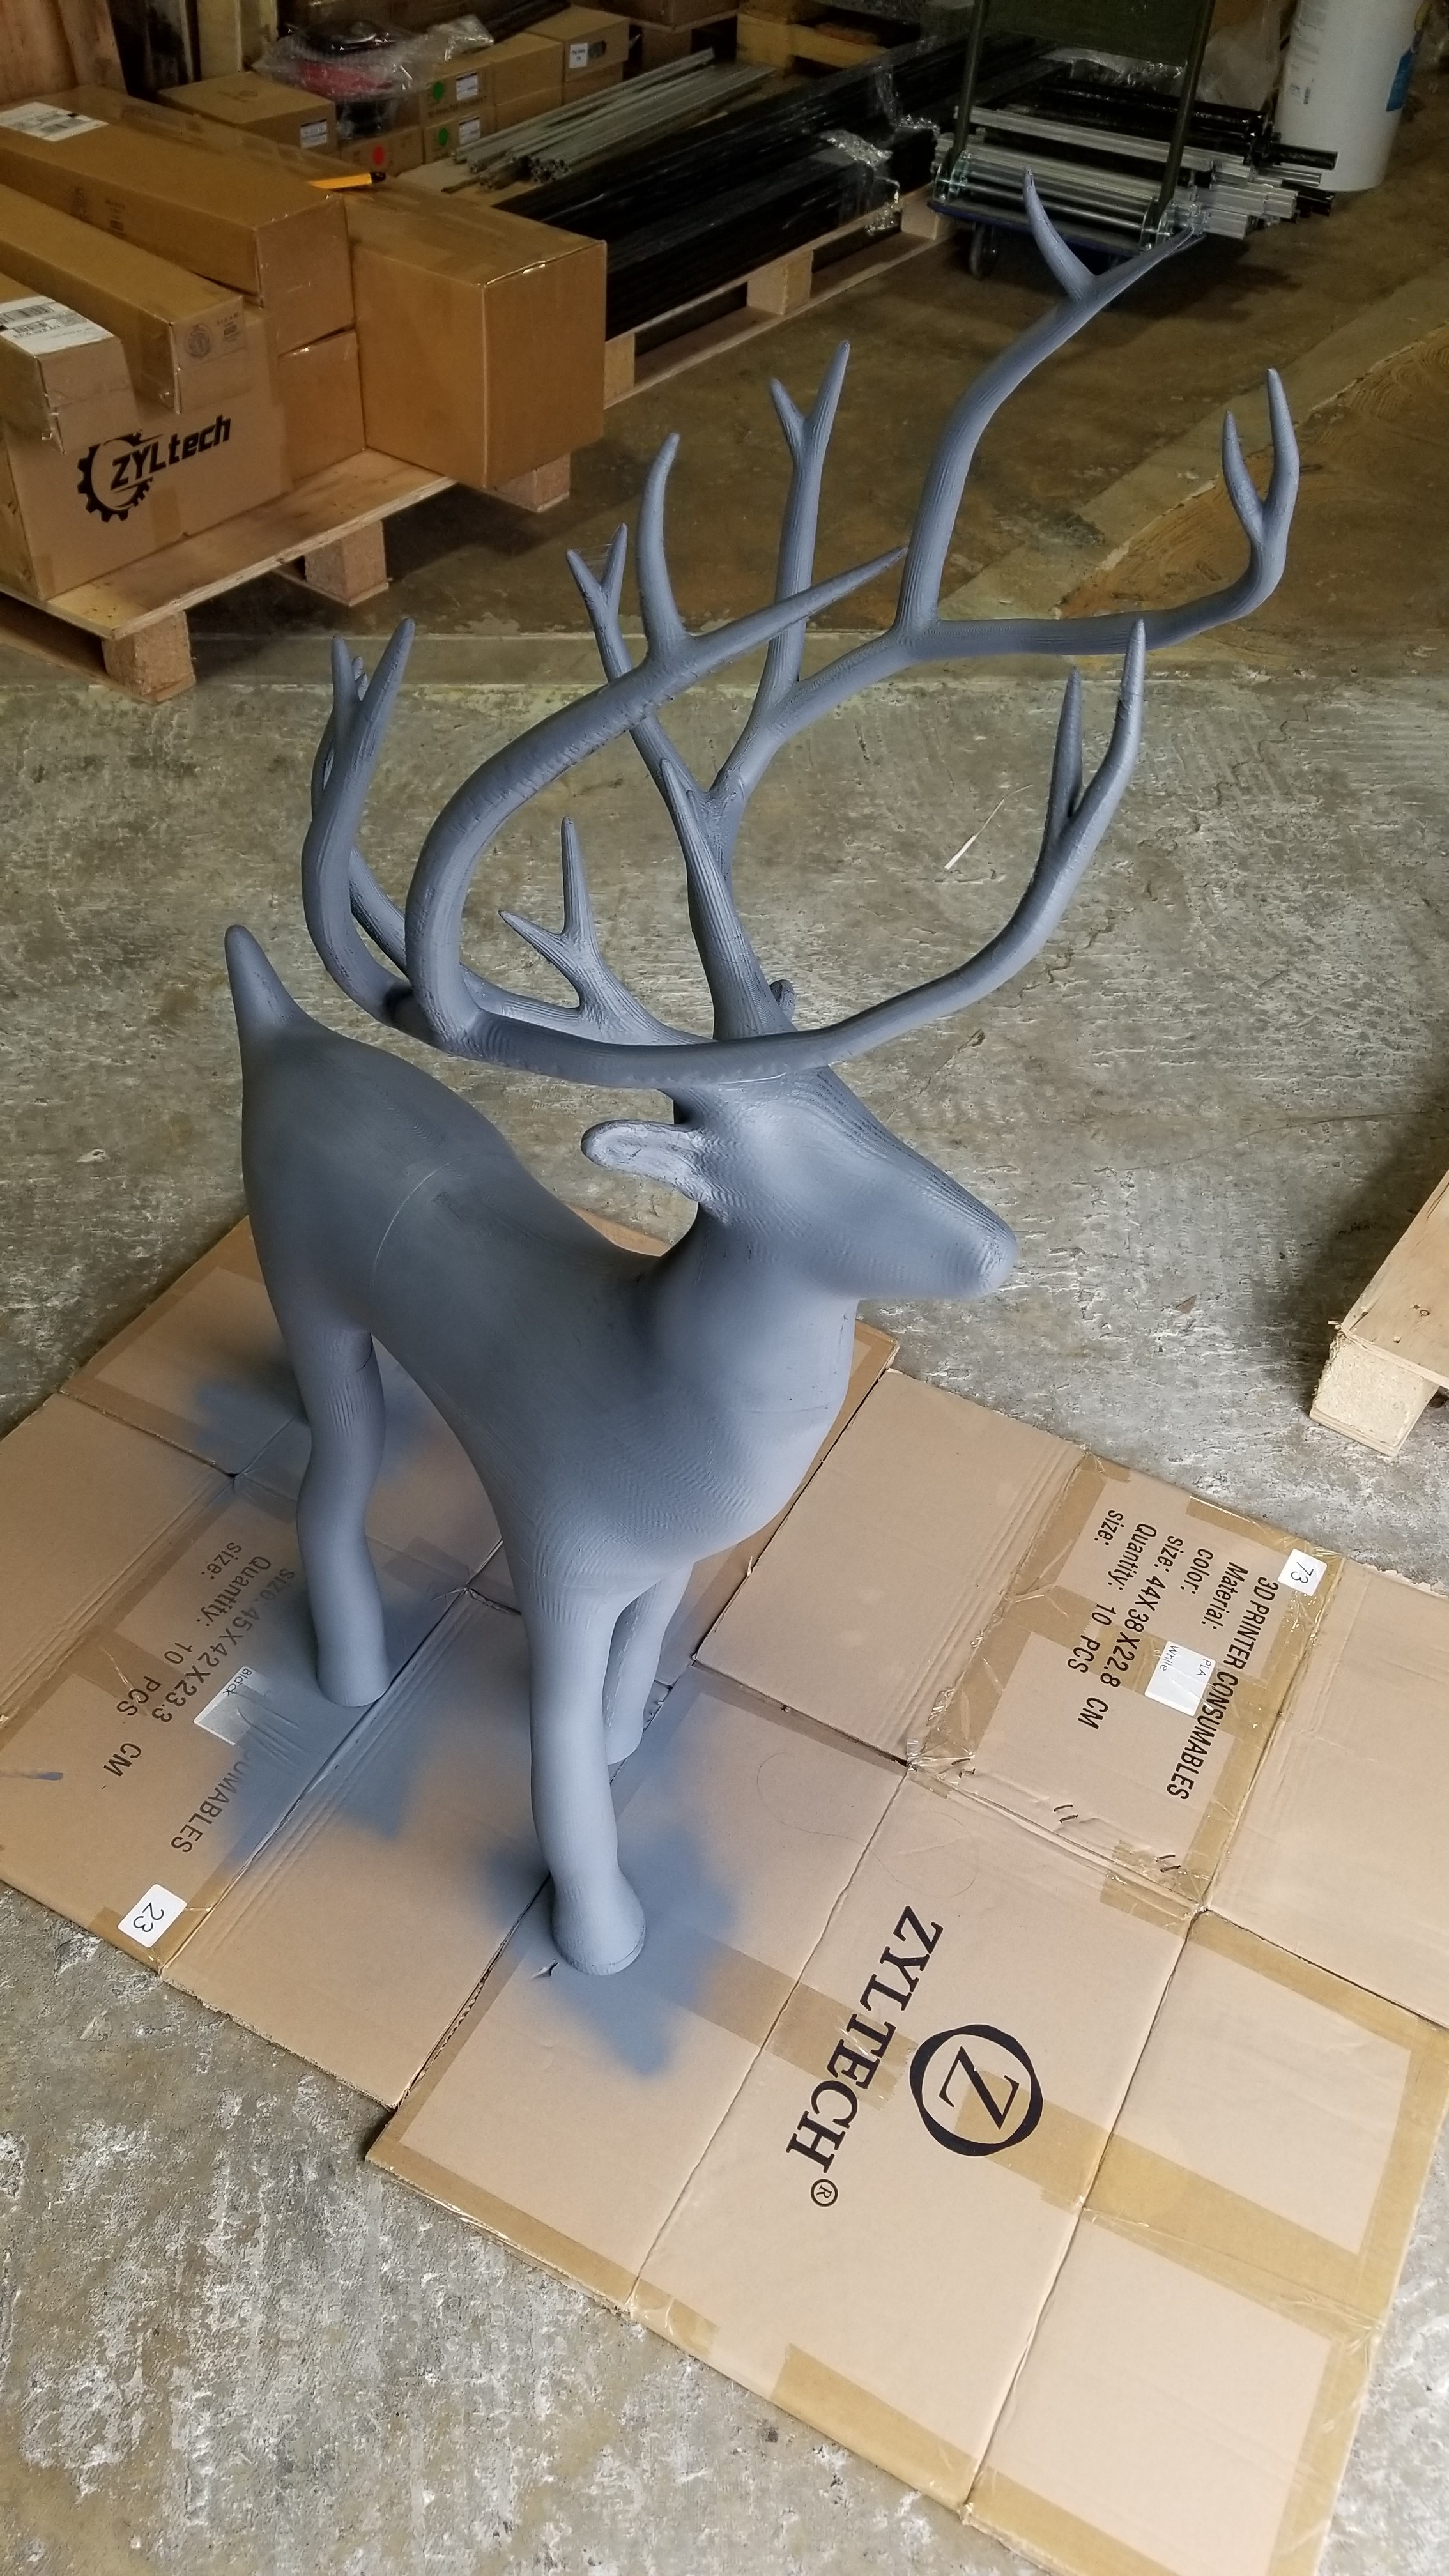
Step 6: Once that dried, we sanded the print to be as smooth as possible.
Step 7: Then came the primer! This part was fairly easy. We used some Rust-Oleum Flat Gray Primer that also bonds to plastic. We gave it about 2 coats and each coat took about 15 minutes to dry.
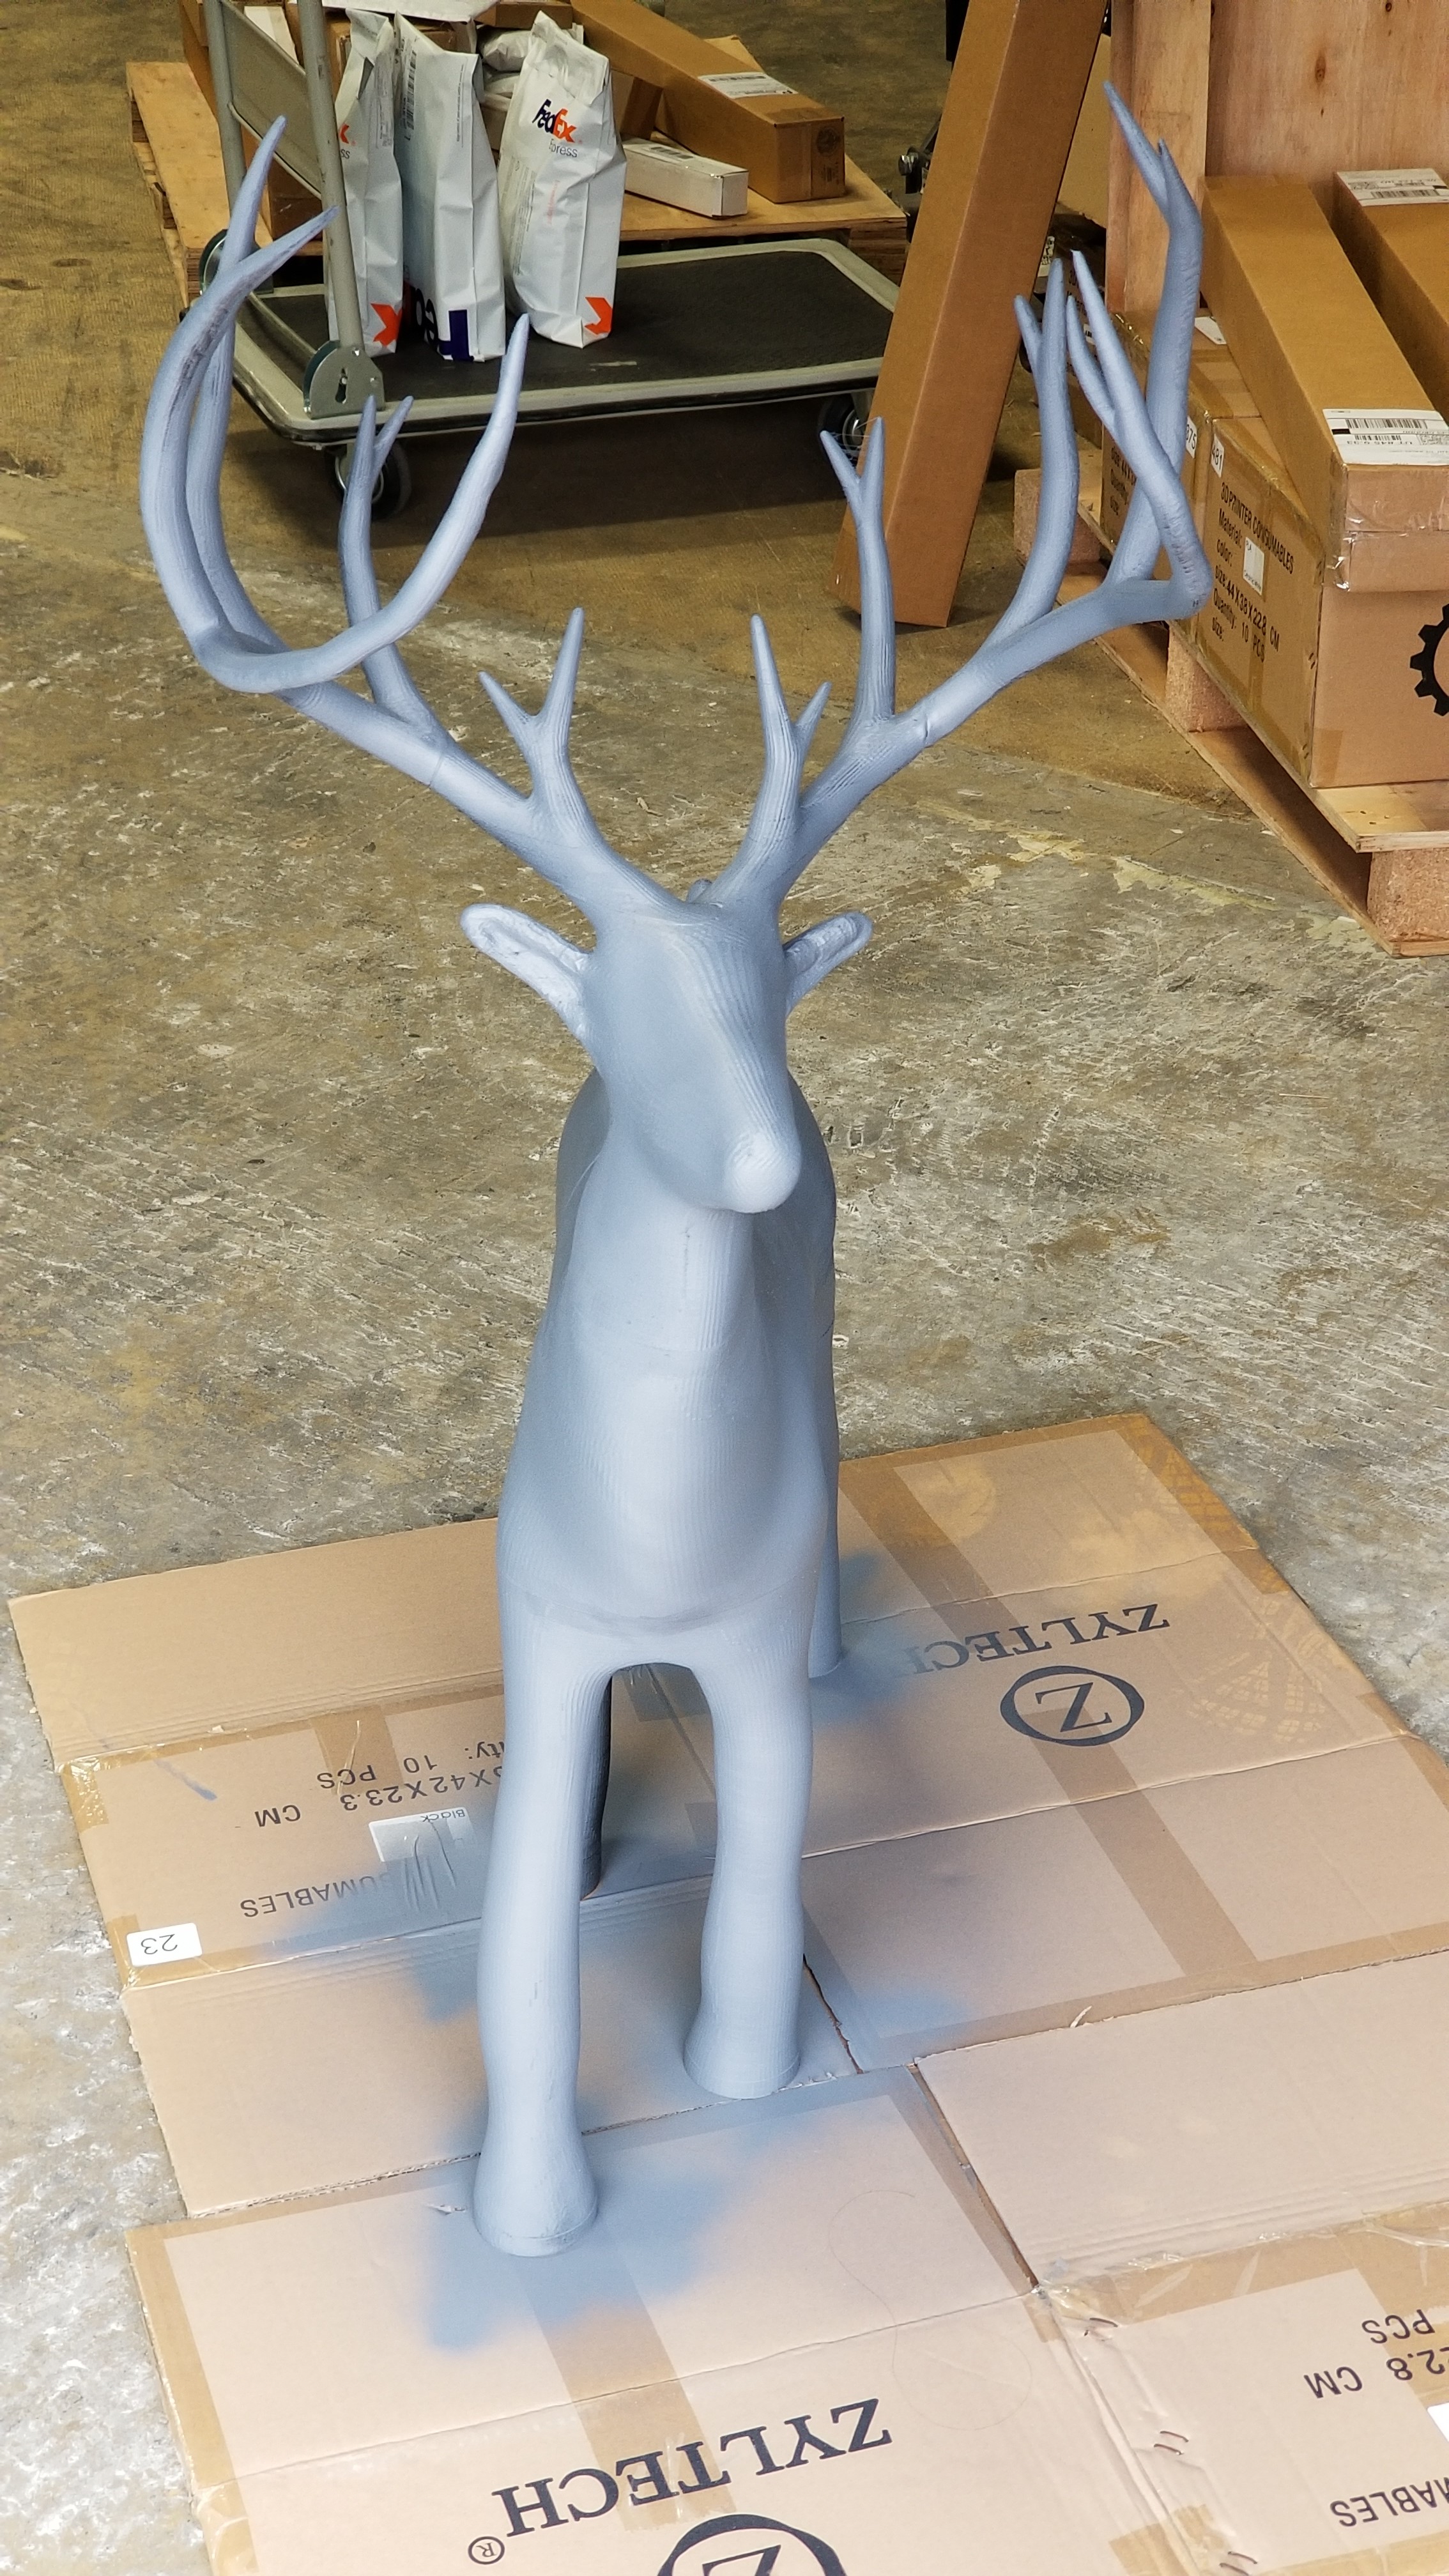
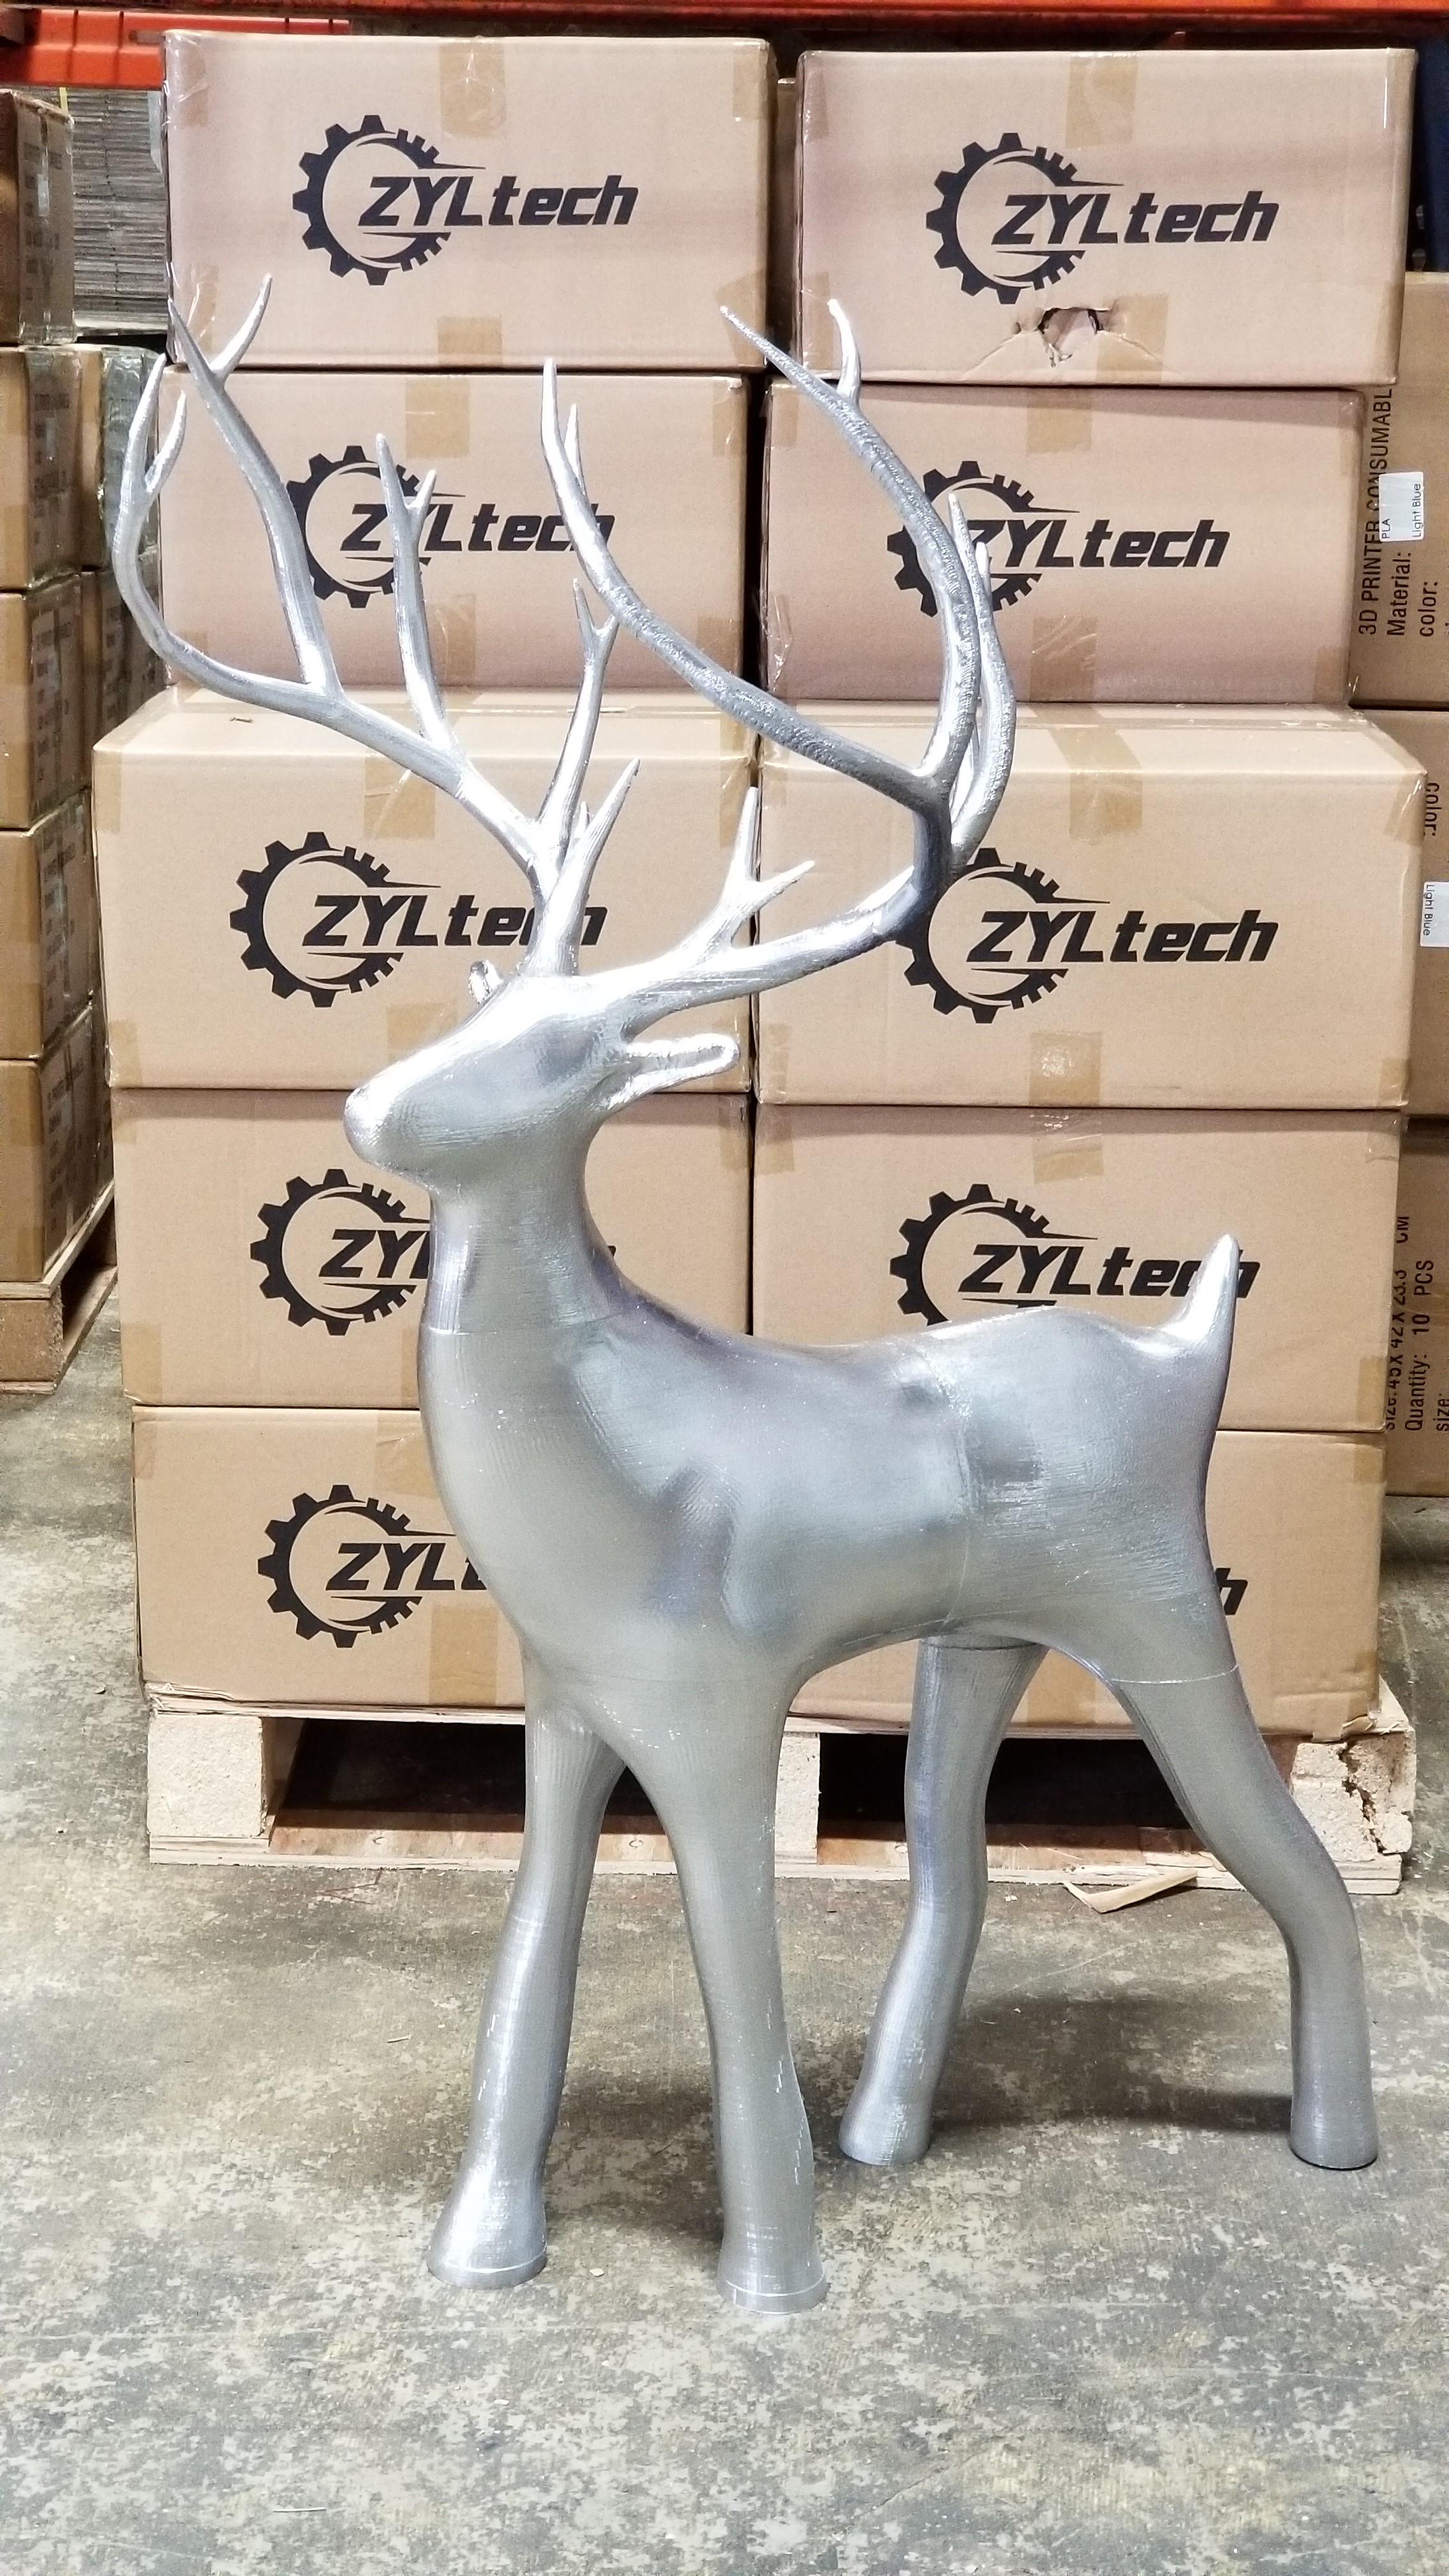
Step 8: Finally, we were able to spray the entire deer silver with Rust-Oleum Silver Spray Paint. Here, we did about 3 coats with 1 can. It covered beautifully. However, I believe the rest of the team received a contact high from the paint. Even with the warehouse bay door open! (Bunch o’ babies!) Next time, I will be sure to take it outside.
There you have it! If you have any questions about the build please let us know at csr@zyltech.com.